In the last article in this series, Stock Photo Browser in React Native: Getting Started, we initialized a React Native app with TypeScript. If you haven't followed through that article, I recommend taking some time to go through it to make sure your project is set up in the same manner as the one we'll be working on below.
Adding navigation to your project
Now that we have a working app, let's add in a way to navigate around to different screens. If you've checked out the Unsplash app for iOS, which we are using for our UI inspiration for this app, you have most likely noticed that there are a few different screens that we are going to need to build. There's a great library called React Navigation that helps with navigating from screen to screen in React Native apps.
Installing the navigation library and dependencies
To install the React Navigation library run this command in your terminal. Make sure that you're in your project root directory before doing this.
npm install @react-navigation/native
This will get you the main React Navigation module for React Native which orchestrates interactions between a few other modules. After this initial install, you need to also add the following modules to your project. Since we are using a bare React Native workflow with TypeScript we can run this command to install the extra dependencies.
npm install react-native-reanimated react-native-gesture-handler react-native-screens react-native-safe-area-context @react-native-community/masked-view

Since we are using a version of React Native greater than 0.60 we don't need to link native modules with
react-native linkioscd ios
pod install
cd ..
Adding the code to your project
After installing all project Pods afresh we need to make some changes to our application code. At this point, we need to import the
react-native-gesture-handlerimport "react-native-gesture-handler"
import React from "react"
import { StyleSheet, Text, View } from "react-native"
import { NavigationContainer } from "@react-navigation/native"
export default function App() {
return (
<NavigationContainer>
<View style={styles.container}>
<Text>Open up App.tsx to start working on your app!</Text>
</View>
</NavigationContainer>
)
}
...
Adding a stack navigator
For navigation in this project, all we'll need is the addition of a stack navigator. Different navigation features are packaged in different node modules when using React Navigation. The last module we'll need to install is the stack navigator module.
npm install @react-navigation/stack
To add a stack navigator to the app we'll need to move the home page UI out of the NavigationContainer component and place it in its own file, then import that home page UI into the App.tsx file and add it as the default screen in the stack navigator.
Let's dive in.
First, let's do a quick refactor and create a
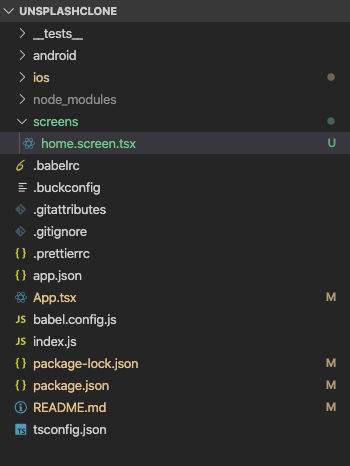
screenshome.screen.tsx
After creating that new screen file, remove the home screen components from the
App.tsxhome.screen.tsximport React from "react";
import { View, Text, StyleSheet } from "react-native";
const styles = StyleSheet.create({
container: {
flex: 1,
backgroundColor: "#fff",
alignItems: "center",
justifyContent: "center",
},
});
export const Home = () => {
return (
<View style={styles.container}>
<Text>Open up App.tsx to start working on your app!</Text>
</View>
);
};
And then back in the
App.tsxcreateStackNavigator@react-navigation/stackApp.tsximport "react-native-gesture-handler";
import React from "react";
import { NavigationContainer } from "@react-navigation/native";
import { createStackNavigator } from "@react-navigation/stack";
import { Home } from "./screens/home.screen";
const AppStack = createStackNavigator();
export default function App() {
return (
<NavigationContainer>
<AppStack.Navigator>
<AppStack.Screen name="Home" component={Home} />
</AppStack.Navigator>
</NavigationContainer>
);
}
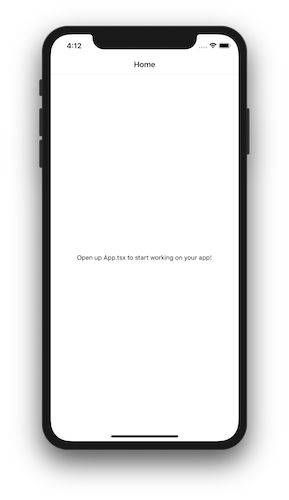
Now run your app in the simulator to make sure that everything is installed correctly and running as expected. If everything went to plan you should see the same default text telling you to open the App.tsx file and make some edits but now with a navigation bar titled "Home" at the top of the screen like this.

Run this command to build and run your app on the simulator.
npm run ios
Now that we know that the stack navigator is installed correctly let's disable that navigation bar since for this screen we're going to add a custom navigation bar. For now, just disable the navigation bar by adding an options prop to the AppStack.Screen component for the home screen and setting header to a function that returns null. It should look something like this.
<AppStack.Screen
  options={{
    header: () => null,
  }}
  name="Home"
  component={Home}
/>
That's a wrap
At this point, we have a new React Native app with the basics of screen-to-screen navigation implemented. Your app now looks the same as it did when we started this section, but it's set up so that we can easily navigate to any new screens we create.
To see the full example so far you can check it out on Github, or if you want to see changes between the last article and this one you can view those differences here.
Join us in section three of the making an app with React Native series where we hook up API integration with Pixabay and data management with Mobx
