How to Make an App With React Native I: Getting Started
I've been working pretty heavily with React Native for the past few years and have come to love the framework for the ease of development that it provides and the wonderful and active community that has rallied around it. I think that it's definitely worth looking into as an option for your next mobile app project.
What we're going to build
I thought it would be a fun exercise to show how to build a stock photo browsing app with UI loosely based on the Unsplash app for iOS to highlight how one might go about building some non-trivial interactions with React Native. This series is going to focus on iOS-specific code since we drawing heavily on the Unsplash app UI.
Okay, let's dive in!
Setting up your environment
In order to build an iOS application, you need to have access to an Apple computer. I've found that my Macbook Pro (which is a few years old at this point) still works quite well for building out React Native apps.
There are a couple of different ways to set up React Native projects these days, so I'm going to go over the steps I'm taking to get the project setup so you can follow along and we can all be on the same page.
To start, you should have Node.js 12 or higher installed on your machine. If you don't have any version of Node I would suggest that you install NVM to your machine. NVM is a program that helps you manage multiple versions of Node.js on your machine. It makes it easy to install specific versions and to switch between those versions should one of your projects need a different version than others. To download NVM follow the instructions on their Github page. Once you've installed NVM run this command to make sure that it's all installed properly.
nvm --version
If you get a version number, you've got NVM all installed correctly! 🎉
Just installing NVM will not get you any versions of Node.js installed. To install Node.js v12 with NVM you can run this command in your terminal.
nvm install 12
This will install the latest stable version of Node.js 12.x.x (for me this was 12.6.1) and switch you to use that version of Node. Now when you run the following command you should get back something like 12.x.x.
node -v
Once you have Node.js properly installed you should install the expo-cli. This is the tool we will use to generate your React Native project. To install it run this command in your terminal.
npm install -g expo-cli
After the install is completed make sure that everything is good to go by running this in your terminal.
expo --version
If this reports back with a version number then you're all set! It's time to generate your project.
Generating your project
Now we're getting closer to the exciting part where we get to make progress on the code for your app. With the expo-cli we just installed we'll be able to create a new React Native project with just a few commands in the terminal. To generate your project run this command in the...you guessed it, terminal.
expo init StockPhotoBrowser
Now when you run this command you will be prompted to select a type of workflow. If you don't know about Expo workflows there are two different types: managed and bare.
Expo managed workflows make it incredibly easy to get up and running with a React Native project in no time, but with that convenience, they lack some of the functionality that you may want as time goes on and your application's needs and features grow. For this project, we could probably use an Expo managed workflow, but my preference is the bare workflow.
Initializing an app to use the bare workflow gives you a lot more control over the app in regards to what dependencies you can use as well as the ability to write native code (Objective-C or Java).
So, back to initializing your project. Select the option that says minimal (TypeScript). Oh yeah, did I mention we are doing this in TypeScript? Don't worry, it's not as scary as it sounds.

Now your project is being built out by the expo-cli, all the JavaScript dependencies are being installed, and before you know it the script has completed. At the end of the output for the last command, there are some directions for getting started. First, you will need to install the cocoapods for the iOS project. If you do not have cocoapods installed on your machine yet, you can follow the getting started guide on their site.
cd StockPhotoBrowser/ios
pod install
Okay, that should be it for setup. Let's run this thing!
Building and running your project
After the pods have installed, back up a directory so you're in the root directory of the project, and run the app with these commands.
cd ..
npm run ios
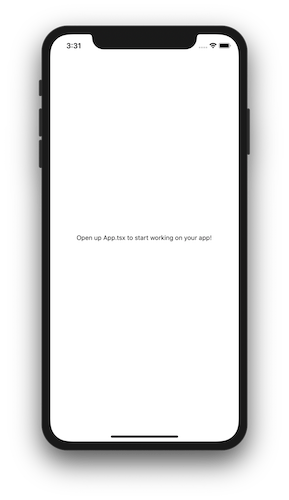
If all goes correctly, you should see the iOS simulator open and your app open inside of it. At the time of writing, it looked something like this.
You did it! Now, regardless of whether that was simple or complex for you, take some time to congratulate yourself. You deserve it. 😉
What's next?
We have a long way to go to pull off a decent looking stock photo browsing app in React Native, but we have a good start. Getting a new React Native project started can be difficult if it's your first time, but if you keep with it, you will become comfortable with working with the framework. I hope that as we go through this series of articles you come to enjoy working with React Native as much as I do.
We're only just getting started! Follow along with the next article on adding navigation to our new React Native application.